Bright Ideas Classroom Reveal
***This post contains affiliate links for Walmart, Target, hand2mind, and Creative QT. By purchasing an item on these using these links, I will receive a small commission on your purchase.***
I am SO excited to share my new classroom space and Makerspace with you! I’ve recently moved classrooms after being in the same room for three years. and it’s the perfect excuse to reorganize and redecorate! I am still at my same wonderful school in my fifth year as the Gifted Resource Coordinator for K-2nd grade (fifteenth year altogether). I teach Gifted and Talented classes, Math Enrichment, and Book Clubs on Tuesday, Wednesday, and Thursday, and on Monday and Friday, my classroom serves as a Makerspace for all students in grades K-2.
If you have been following me awhile, you know that I absolutely LOVE my job. I love that I get to teach to unique Multiple Intelligences, infuse STEM and Robotics, and explore outside-the-box enrichment concepts. I also adore my administrators and colleagues and love how my daughter, Ellie, is right down the hall. My son Beau will join us in Pre K next year.
It is a school that is overflowing with positivity, with STELLAR teachers who always put children first. It is my happy place…my home away from home…and I can’t imagine spending my days anywhere else.
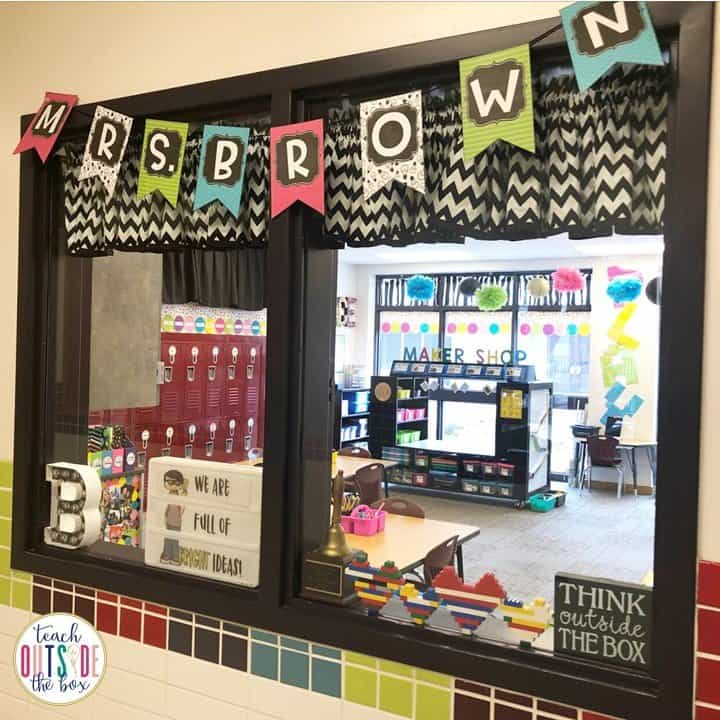
Here are some links you might be looking for from the photo above:
LEGO CLIP ART FOR “PLAY” LETTERS
Tissue poms and paper lanterns are from Hobby Lobby and Michaels.
This is a view of my new classroom from the hallway. The pennant banner with my name is from my dear friend, Ashlyn of The Creative Classroom. The curtains were sewn by the mother of one of my teacher friends.
This is by FAR my favorite new addition to our classroom.
Introducing our “One Stop Maker Shop,” handmade with love by my incredibly talented husband, Andy. Earlier this year, I asked him to build me a low play table with storage underneath. We envisioned an all-in-one solution to hodgepodge Makerspace storage that had everything kids needs to create. Many blueprints and hours at the workshop later, this is what he created, and it’s SO much more than I imagined. Yes, it’s a play table, but it also has interactive panels on the sides, a dry erase tabletop, STEM Bins and task cards across the top, and more storage than I ever dreamed of. There is enough room for up to 8-10 kids to create and play at once!
I’ll be honest with you guys. When I first saw the finished Maker Shop that he actually MADE with his own two hands, I literally almost exploded with excitement and pride. I still can’t believe that he designed and created this himself. I feel like some sort of Teacher Husband of the Year award is definitely in order, am I right?!
We’ve recently partnered with an educational furniture company in Oklahoma City to produce and sell our Maker Shop design! More information to come soon!
Here’s a closer peek at all the amazing components:
Storage shelves are on the bottom of the table on both sides, fitting three shoebox sized tubs across or two larger 16-quart sized tubs in the outer sections. The middle sections fit plastic trays and/or construction paper perfectly! These trays are from Target Dollar Spot and are ideal for gathering Makerspace materials and taking to other spots to create. The top bar has my STEM Bins and task cards and on the bottom left are my Outdoor Discovery STEM Bins.
The lime green, turquoise, and pink baskets on the top sections are from Hobby Lobby. They are filled with arts and crafts materials such as paper goods, rubber bands, toothpicks, craft scissors, and more. All the labels shown are the Bright Ideas labels from The Creative Classroom.
Here’s a closer look at the interactive panels on the sides of the Maker Shop, which are my favorite part! The right side is a magnetic dry erase board, perfect for magnetic gears and marble runs like this one from Learning Resources. The left side is a split geoboard and peg board with neon golf tees! This frees up room for 2-3 children to create on either side.
This is the back side of the Maker Shop with more storage for materials. We have Magformers, Playdoh Touch, K’Nex, and KEVA Planks.
My Maker Mats are displayed on the side of our Maker Shop and I will switch them out each month. Maker Mats are simple, creative choice boards that promote divergent thinking and creative expression. They are the ideal complement to a Makerspace or creative learning area in any classroom or media center, with simple-open ended tasks that guide imaginations and are appropriate for even the youngest learners.
My STEM Bins are available to purchase as fully stocked kits from Hand2Mind or as a printable download in my TpT Shop.
Ellie and I created these jumbo Makerspace letters together last year. They are paper mache letters from Hobby Lobby that we painted black, and we hot glued a variety of Makerspace materials to the surface.
The left shelf contains all our math manipulatives (which also double as engineering materials!) as well as LEGO, LEGO Baseplates, and Alpha Briks, and the right shelf contains a variety of engineering materials and robotics.
The posters above the shelves are specific to our Makerspace expectations for our school. Approximately 300+ students rotate through my Makerspace on a weekly basis, so the Arts and Crafts supplies are only open to one grade level per month in order to conserve supplies. On the right poster, I will add new apps, mini lessons, and project ideas for the students throughout the year.
The LEGO Wall in the center has baseplates from Amazon that we hot glued to a piece of plywood, and Andy added a silver frame before we drilled it into the wall. I printed the Maker Mat above it poster sized and will switch it out each month.
Some of the items on the right shelf that we love are Snap Circuit Jr., Botley the Robot, Gears, Code and Go Mouse, KEVA Planks, Lakeshore Engineering Kits. The LEGO Storystarter kits on the top right are unfortunately not sold anymore.

This rainbow tabletop drawer system is from Michaels and stores all of our STEM Bins Seasonal Task Cards.
The confetti bulletin board borders are from Teacher Created Resources and the poster sets and pennant banners are from The Creative Classroom. “RISE” is our schoolwide PBIS mantra and stands for “Respect, Integrity, Self-discipline, and Excellence.”
This is a view of the right side of my windows. I made the giant “PLAY” letters using building brick clip art from Photoclipz. I just enlarged the bricks in PowerPoint, printed on Astrobrights paper, and taped them together to make letters. The small table on the left is our Osmo station. The lap trays on the right are from Target Dollar spot and the “Think Big” tub is filed with cardboard rocket tubes and jumbo pipe cleaners for big engineering. The turquoise cart and and black shelf are designed to house STEM materials and projects that are still in progress.
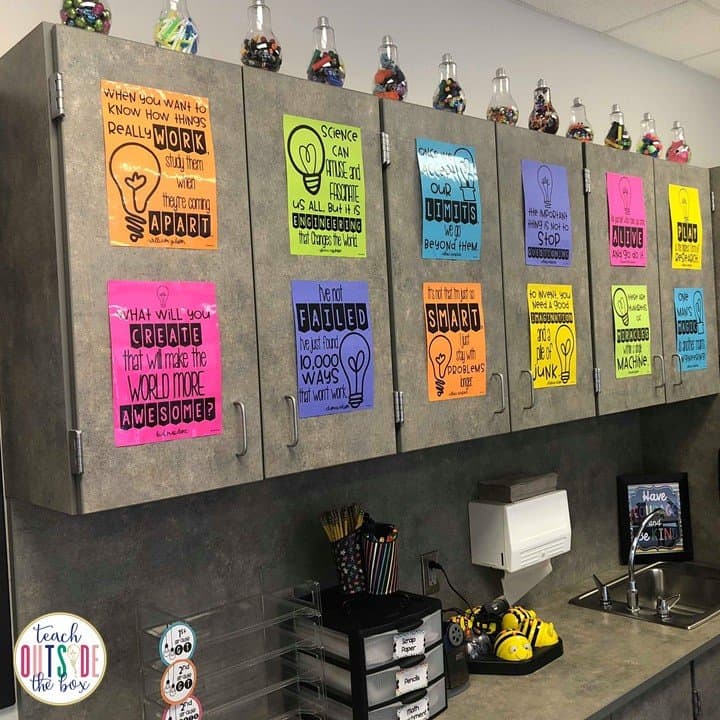
These upper cabinets store all my master teaching materials and books. The quote posters on the front feature famous inventors, engineers, and inspiring figures. The lightbulbs across the top are actually plastic water bottles. that we filled with various maker materials. These also look super cool when they are strung into a banner or hung from the ceiling! The labels on the turn in baskets are from The Creative Classroom.
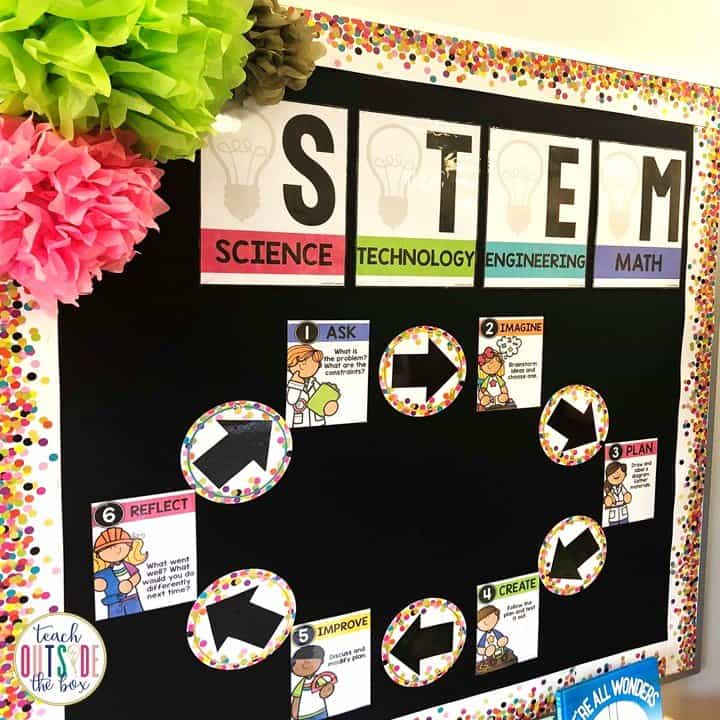
This might be my most favorite bulletin board I’ve ever done! I backed it with black fabric and pinned tissue poms from Hobby Lobby and Michaels. The posters are in the STEAM/Multiple Intelligences Bulletin Board set from The Creative Classroom and the confetti border and diecut circles are from Teacher Created Resources.
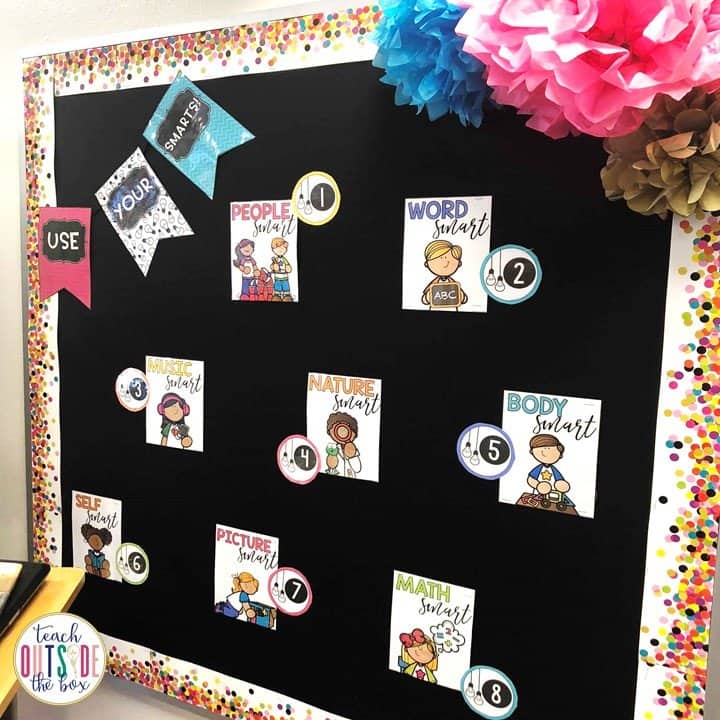
During the first weeks of school, I give my students a survey to determine their strongest Multiple Intelligences, or “Smarts.” We constantly refer to our different smarts throughout the year during our lessons, and are always working to celebrate our strongest smarts and improve our weakest smarts. We also refer to our “People Smarts” during all collaborative activities. The posters are in the STEAM/Multiple Intelligences Bulletin Board set from The Creative Classroom, confetti border is from Teacher Created Resources, and pennant banner is from The Creative Classroom.
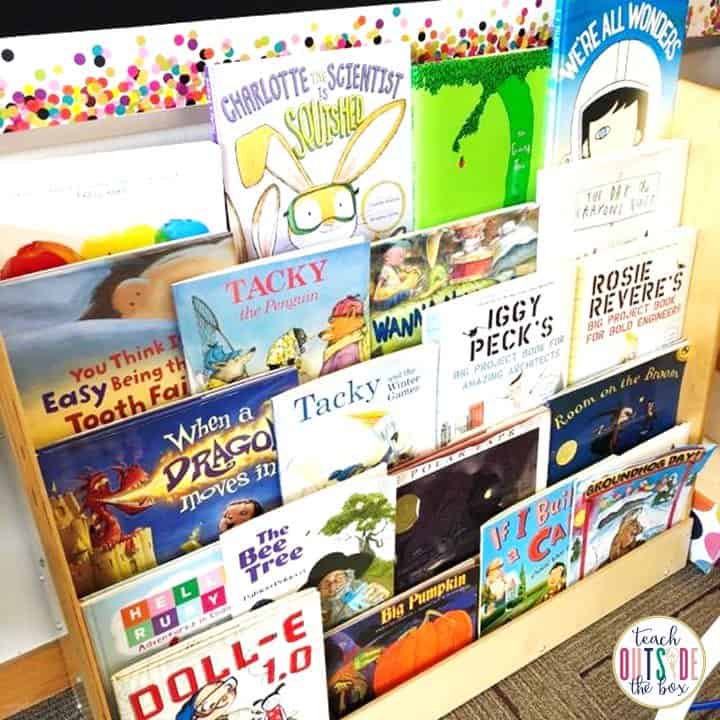
This book display holds many of our favorite STEM books and Storybook STEM titles.
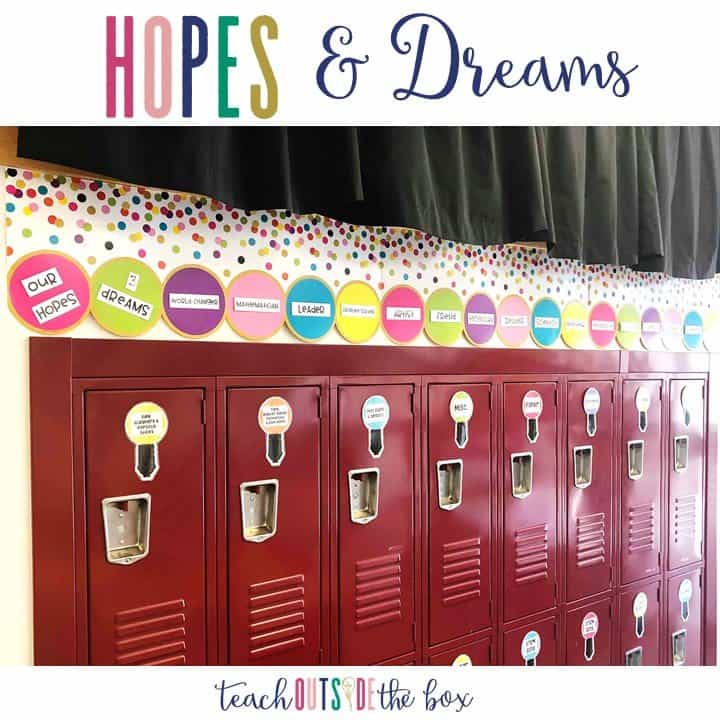
Since I am a specialty teacher, my lockers serve as storage for extra Makerspace materials. The lightbulb diecuts are from The Schoolgirl style and colored circle labels on top are from The Creative Classroom. The jumbo confetti border is from Teacher Created Resources and I’m using this one as a “Hopes and Dreams” display for my students. They will each choose a role that they will strive to be this year and will add their name on the top with a Post-it. The curtains above my lockers and on my hallway windows were sewn by a teacher friend.
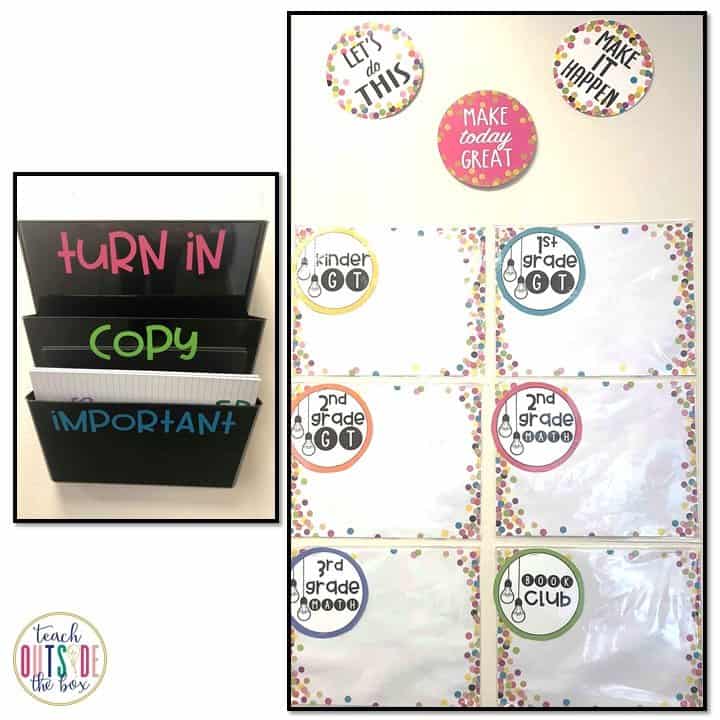
I’ve hung these black trays right my classroom door so I can keep track of all important papers. I used my Silhouette cameo to make the vinyl labels on the top and the font is from Amy Groesbeck. The papers on the right will serve as my objectives boards for each week. I just placed confetti paper inside page protectors so that they’re dry erase. The labels for each of my classes are from The Creative Classroom and confetti die-cuts on the top are from Teacher Created Resources.
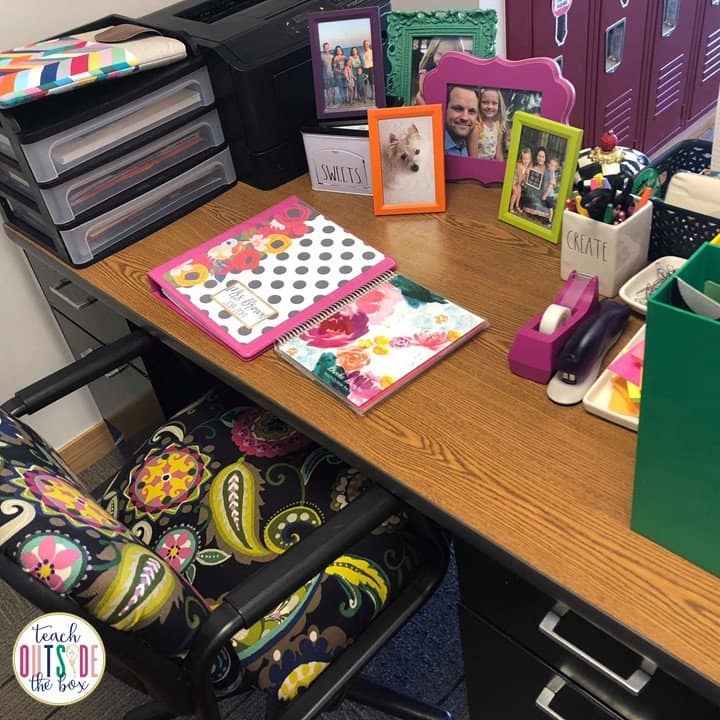
This is my teacher desk that will totally be destroyed in a few weeks, I’m sure! 😉 My planner/teacher binder is from The Creative Classroom and notebook is from Erin Condren. The Rae Dunn goodies are from TJ Maxx.
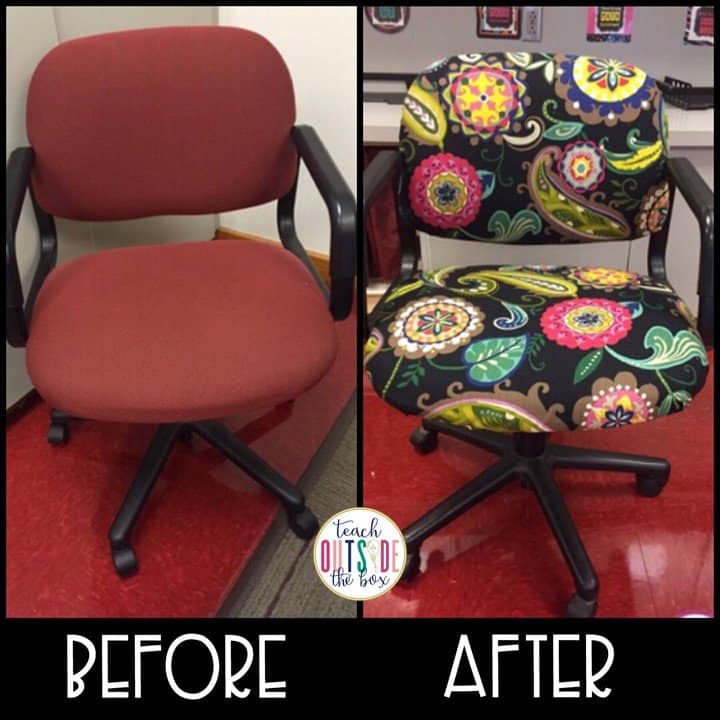
Interested in how to recover your office chair? It only took my dad and me around an hour a few years ago!
Here’s the rundown:
You’ll need about 2 yards of fabric, a staple gun, safety pins or straight pins, and tools to take the screws out of your chair.
1) Unscrew the back of the chair to remove from the frame. Mine also had a plastic cover that I pulled off, which was great because it hid the edges of the fabric.
2) Wrap your fabric around the seat back and use a staple gun to staple it around.
3) Put the cover back on and reattach to the chair.
4) Detach the bottom of the chair. I didn’t have to take off the chair legs because I could get to the seat without taking it off.
5) Wrap the fabric around the bottom and either staple or use safety pins or straight pins to pin it around. I just used pins because it was easier than disassembling the whole chair and NO ONE sees the underneath part anyway!
6) Reassemble the bottom of the chair.
THAT’S IT!!! Makes me wish I actually sat down more during the school day, right?!
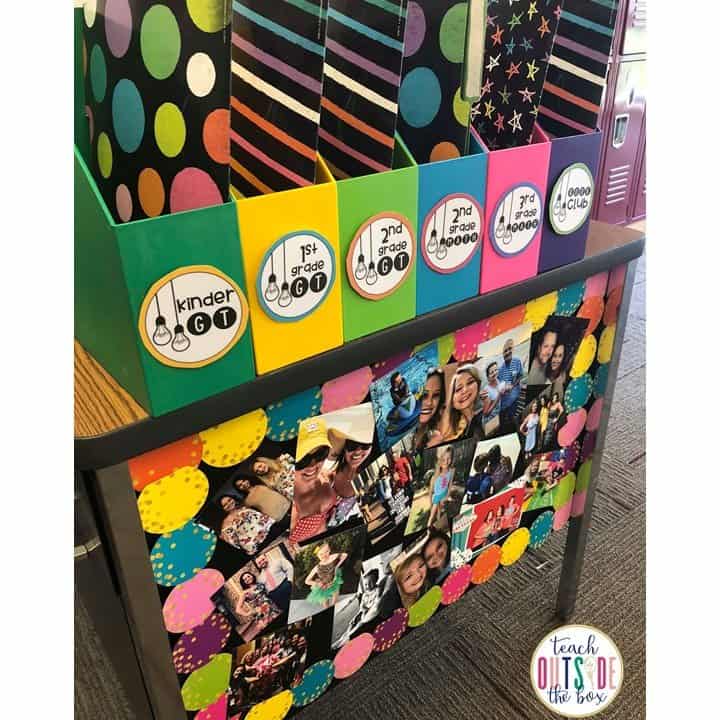
These magazine files are where I store all my weekly copies, read alouds, task cards, and teacher materials for each week. The labels on the front are from The Creative Classroom. I taped photos of my family and friends on the side panel of my desk along with this adorable confetti border.
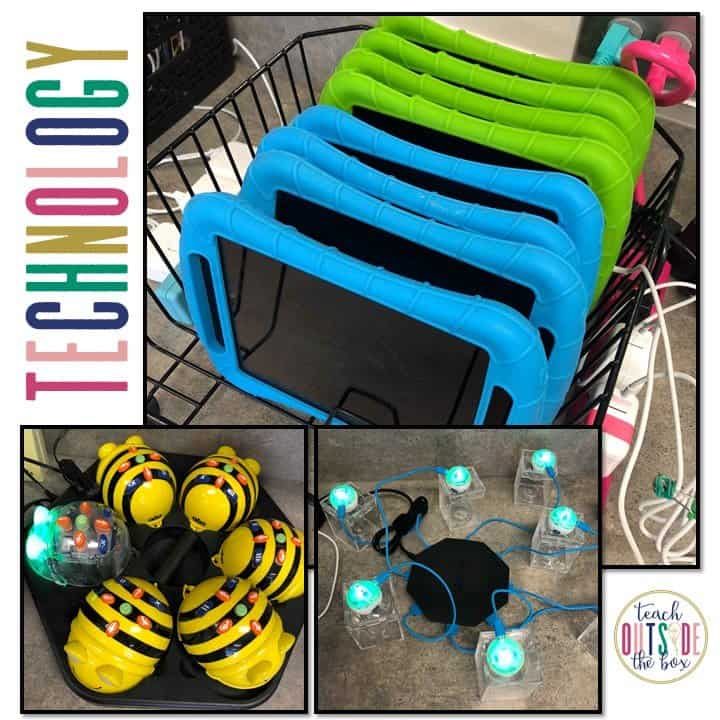
Here are some of the tech and robotics options in my classroom. I store these on the counter tops underneath my cabinets because we have plenty of outlets on that side. We have 8 iPad minis for my students to share. We also have Bee Bot robots and Mini Spheros that my kiddos love.
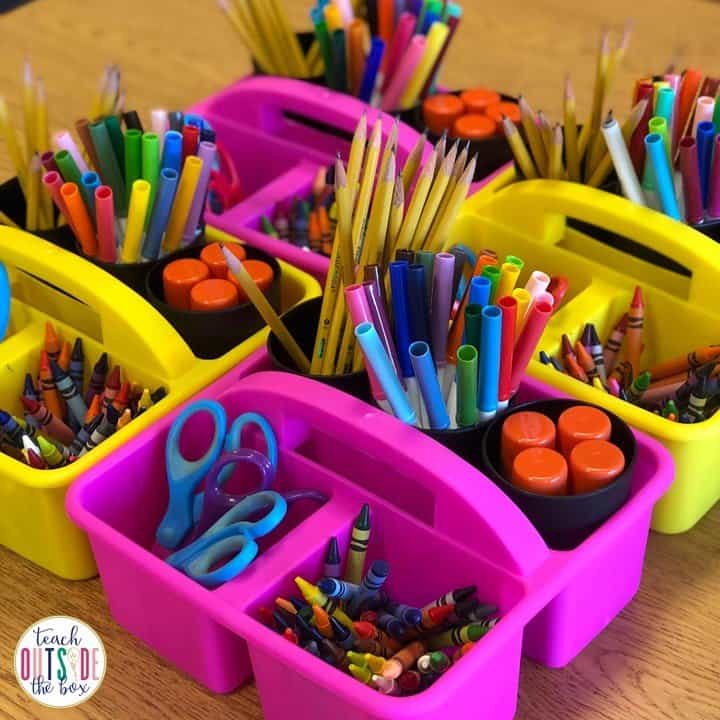
These table caddies and black tumblers inside are both from Target Dollar Spot.
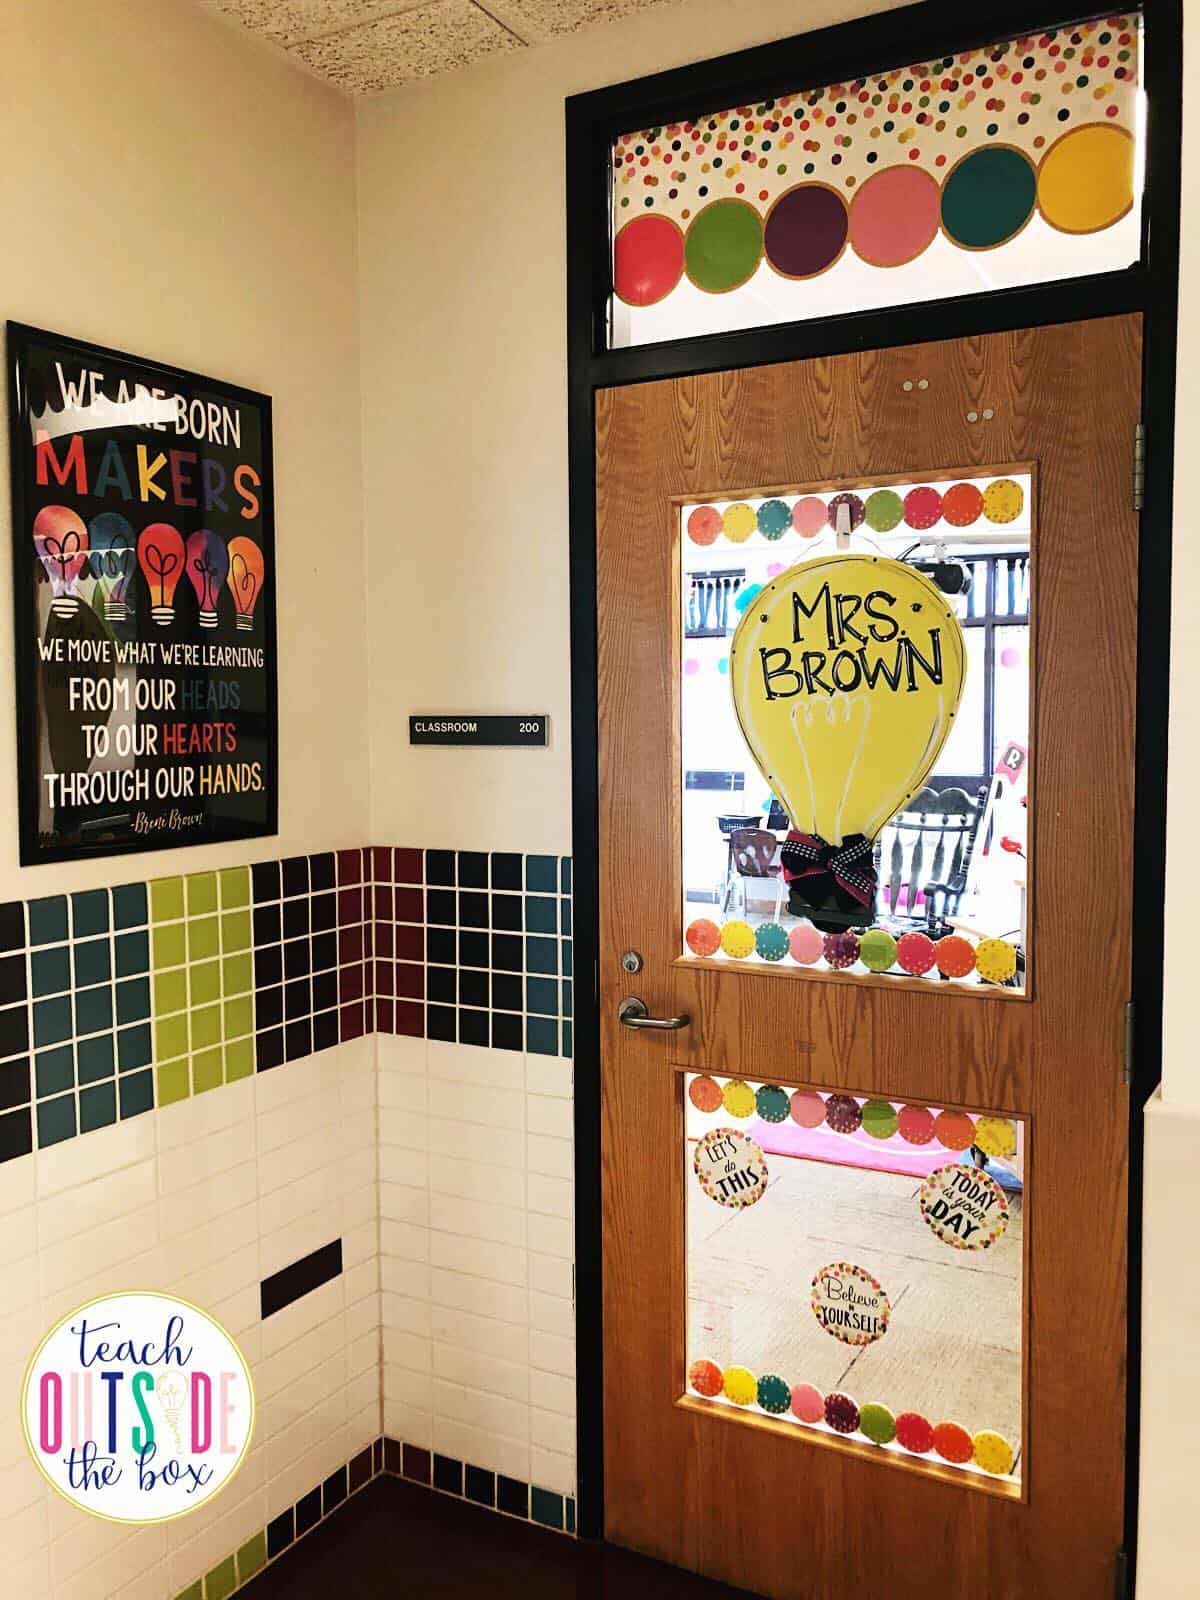
The Maker lightbulb poster on the left is a FREE download when you subscribe to my newsletter!
The lightbulb sign on my door was handmade with love by my talented teacher friend, Destiny Gorges. Check out her Instagram page at @maknmiaco for ordering information.
I hope you love my new classroom space as much as I do! The only thing that’s missing is my sweet students! I can’t wait to start sharing my space with them very soon.
***This post contains affiliate links for Walmart, Target, hand2mind, and Creative QT. By purchasing an item on these using these links, I will receive a small commission on your purchase.***
