


Welcome to my Makerspace

***This post contain affiliate links for Walmart, Target, Creative QT, and hand2mind. By purchasing an item on these sites using these links, I will receive a small commission on your purchase.***
Are you interested in starting a classroom or school Makerspace OR maybe want to learn more about how Makerspaces work? You’ve come to the right place! I have to admit that this blog post is lonnnnnng overdue because my Makerspace has been ever changing and evolving over the past three years. The “Makers Movement” is gaining more and more traction in elementary schools each year, and the positive impacts on our student are truly immeasurable!
I’ll start with some Makerspace basics and then give you an up close look at all of my current Makerspace components and how they work!
Watch the full video tour below:
What is a Makerspace?
A Makerspace is an area of the classroom or common media space that is reserved for creative exploration, engineering, tinkering, and inventing. Makerspaces incorporate engineering materials, crafting materials, technology, robotics, and more. The area can be used during whole class STEM challenges, incorporated as a center or small group rotation, or accessed during unstructured creative time with STEM Bins or Maker Mats. You may choose to limit materials or assign specific tasks to students. You may also choose to allow time for more free range exploration and inventing. The possibilities are endless!
A Makerspace can be located in an entire section of classroom, a bookcase, or even a mobile rolling cart. Supplies should be clearly labeled on containers and baskets, and materials should be safe and developmentally appropriate for the age of students that you teach. Supplies can be rotated in and out as you see they are needed.
Although it might take time to achieve a well-stocked Maker Space, many of the supplies you will acquire can be used over and over again. Most teachers, myself included, are “hoarders” of creative supplies. The first place you should search for possible Makerspace supplies are your own cabinets, supply closets, and pantries. Retiring teachers are usually willing to give up years of collected supplies. Garage sales, thrift stores, Dollar stores, craft stores, and hardware stores have many inexpensive supplies. For pricier materials such as robotics, I would highly recommend seeking out grant opportunities through organizations such as Donorschoose. Parents are usually great resources for the donation of inexpensive materials.
Why Makerspaces?
The purpose of a Makerspace is to tap into as many different interests, passions, and strengths in our students as possible. As educators, we are tasked with the most important job in the world…Creating the next generation of problem solvers, innovators, and earth-shakers. In a Makerspace, children have opportunities to discover, assemble, construct, test, and explore using divergent, “outside the box” thinking. Through creative exploration and purposeful play, students become critical thinkers and inventors while collaborating with their peers.
Welcome to my Makerspace
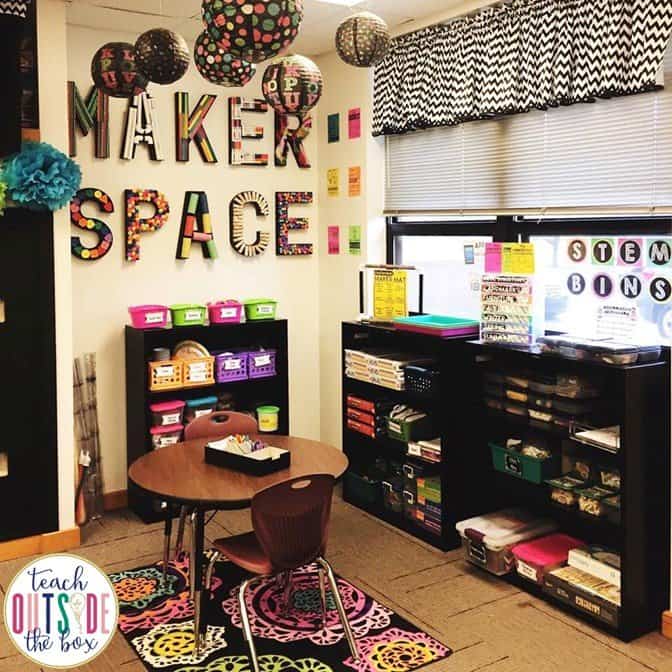
My Makerspace is located in the corner of my classroom, with the majority of my materials stored in these three large shelves. I also have some materials stored above my cabinets and on a rolling cart as needed. I have a separate LEGO wall, which is pictured below. The rug below the table was purchased from At Home.
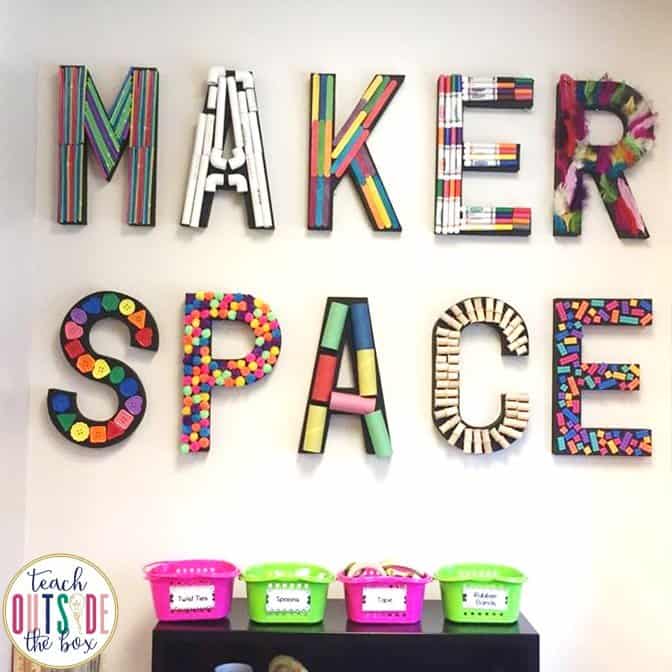
My favorite brand new addition to my Makerspace are these giant paper mache letters from Hobby Lobby. My daughter and I grabbed these at 50% off, painted them black with black acrylic paint, and hot glued everything we could find in the back of my cabinets at home and school. Items starting from the top going right: straws, PVC pipes, popsicle sticks, dried out markers, feathers. Second row: buttons, pom pom balls, toilet paper rolls, wooden spools, Target building bricks. They are extremely lightweight, so I used clear thumbtacks to hang them on the wall.

This shelf primarily contains paper goods and arts and crafts supplies, which you can see labeled on each tub. I purchased the boxes with lids and purple/orange baskets on top from Walmart a few years ago. The ones without lids are from Target Dollar Spot. Editable labels and supply checklists are available in my Makerspace Starter Kit.
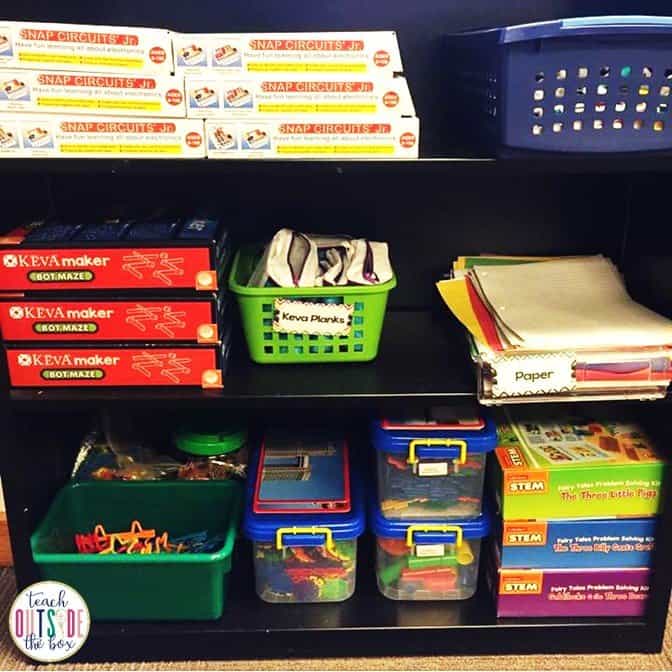
Almost all of the items pictured above were purchased through grant awards or yearly allocations. Snap Circuits Junior are a big favorite among my kids, allowing students to experiment with basic electrical engineering. We also love creating with Keva Planks Brain Builders and our new Keva Maker Bot Mazes. The STEM kits on the bottom shelf were purchased at Lakeshore Learning Store.


My STEM Bins area is also included in my Makerspace, with everything students need for simple engineering. STEM Bins are ideal for early finishers, morning work, centers, and so much more! Check out my post below to read all about STEM Bins:
STEM Bins: Hands-on Solutions for Early Finishers
The rainbow organizer on the top of the shelf contains photo task cards to inspire students’ creations, with STEM Bins on the first shelf and Outdoor Discovery STEM Bins on the second shelf. Foldable recording booklets are also provided as well as Quick Writes in the pocket chart on the wall.

Here are three of my favorite engineering materials for any Makerspace or STEM Bins area: Goldiblox, KEVA Planks, and Magformers. These materials are favorites among my kiddos and extremely versatile, so we use them for STEM Challenges as well as STEM Bins or Makerspace time.

Our monthly Maker Mats provide students with just the right amount of guidance and inspiration as they create in the Makerspace. Tasks are simple and open-ended, appealing to a wide range of student interests and multiple intelligences. I hang my Maker Mats on a tabletop chart stand so that I can easily rotate monthly tasks. Maker Mats can also be sent home with students for a more meaningful and creative homework option.

Our iPads and technology are located in a separate area of my classroom so that they can be charged easily. After I introduce apps to my students, I encourage them to incorporate those apps into Makerspace tasks. Each month, we focus on a new creative app as the “App of the Month.” The app cards pictured above are found HERE.

On top of the round table, students can look through the various App Card options and may also choose to build a simple structure with the engineering task cards.

I moved my LEGO wall to a separate area near my Makerspace so that it is more easily accessible to students. I leave this area fairly open ended, although the Basic Engineering posters pictured above are a wonderful way to encourage students to use more engineering vocabulary as they create. Students love to use the LEGO wall to create birds-eye view creations, letters, and basic structures and scenes. The rainbow baseplates are found HERE. I am so thankful for my handy husband who hot glued the base plates to plywood and framed it for easy hanging on the wall. 365 Things to do with LEGO Bricks is also an awesome source of inspiration for your kids in any LEGO area.

My Makerspace Quote Posters feature famous quotes by scientists, inventors and scholars that promote the engineering design process and a growth mindset. They’re ideal to display in a Makerspace or any classroom.

Finally, my STEM bulletin board is the perfect visual for students to remind them of our steps for the Engineering Design Process.
Thank you so much for letting my share my Makerspace with you! If you have any questions, please comment below.
***This post contain affiliate links for Walmart, Target, Creative QT, and hand2mind. By purchasing an item on these sites using these links, I will receive a small commission on your purchase.***


